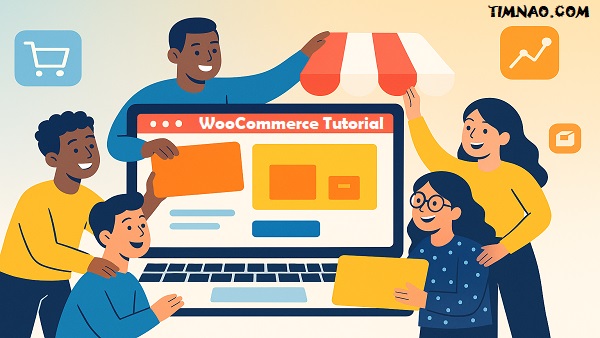
🚀 Unlock Your Online Empire: The Ultimate WooCommerce Tutorial for Astonishing Success!
Welcome to the exciting world of online retail! If you’re dreaming of launching your own eCommerce website and want to start selling online, you’ve come to the perfect place. This comprehensive WooCommerce tutorial is designed specifically for beginners, guiding you through 7 astonishing steps to build a powerful and profitable online store. We’ll break down complex concepts into easy-to-understand language, ensuring you have all the tools and knowledge to succeed.
The digital marketplace is booming, and WooCommerce stands out as a leading platform, powering a significant portion of all online stores. Its flexibility, scalability, and user-friendly interface make it an excellent choice for entrepreneurs, small businesses, and even larger enterprises. Get ready to transform your business idea into a reality!
📚 Table of Contents
- ✨ Introduction: Why WooCommerce is Your Go-To for Selling Online
- The 7 Astonishing Steps to Your WooCommerce Success:
- 🌍 Step 1: Laying Your eCommerce Foundation (WordPress & Hosting)
- Understanding Your Domain Name
- Choosing the Right Web Hosting
- Installing WordPress: Your Website’s Core
- ⚙️ Step 2: Installing and Configuring WooCommerce for Your Online Store
- Seamless WooCommerce Installation
- Navigating the Setup Wizard
- Essential WooCommerce Settings
- 🎨 Step 3: Designing Your Stunning and User-Friendly Storefront
- Choosing the Perfect WooCommerce Theme
- Customizing Your Store’s Appearance
- Using Page Builders for Unique Designs
- 🛍️ Step 4: Adding and Showcasing Your Products Like a Pro
- Understanding WooCommerce Product Types
- The Art of Adding a New Product
- Managing Inventory and Variations
- 💳 Step 5: Crucial Commerce Setups: Payments and Shipping Solutions
- Integrating Secure Payment Gateways
- Configuring Shipping Zones and Methods
- 📢 Step 6: Marketing Your New Store and Attracting Your First Customers
- SEO Basics for Your eCommerce Website
- Content and Email Marketing Strategies
- Leveraging Social Media and Basic Promotions
- 🚀 Step 7: Managing Daily Operations, Ensuring Security, and Planning for Growth
- Handling Orders and Customer Communication
- Essential Security Measures for Your Store
- Maintaining and Scaling Your WooCommerce Business
- 🌍 Step 1: Laying Your eCommerce Foundation (WordPress & Hosting)
- 🔮 Your eCommerce Journey: Final Thoughts and Next Moves
✨ Introduction: Why WooCommerce is Your Go-To for Selling Online
Embarking on the journey to start selling online can feel both thrilling and a bit daunting. But don’t worry! The very first step is understanding what an eCommerce website truly entails. It’s more than just a digital catalog; it’s your virtual storefront, your brand’s home on the internet, and the engine that will drive your sales.
Before diving into the technicalities, take some time to define your vision. What will you sell? Who is your target audience? What kind of experience do you want to offer your customers? Answering these questions will provide clarity and direction as you move through this WooCommerce tutorial and its 7 key steps.
WooCommerce is an open-source eCommerce plugin built for WordPress, the world’s most popular content management system. This means it’s free to download and use, though you’ll have other costs like hosting and potentially premium themes or plugins. Its open-source nature gives you incredible freedom and control over your store’s design and functionality. This is a significant advantage over platforms that lock you into their ecosystem.
The beauty of WooCommerce lies in its adaptability. Whether you’re selling physical products like handmade crafts or t-shirts, digital downloads like ebooks or software, or even services and subscriptions, WooCommerce can handle it all. It’s designed to grow with your business, making it a fantastic choice for beginners who have big ambitions. Now, let’s dive into the first of our 7 astonishing steps!
🌍 Step 1: Laying Your eCommerce Foundation (WordPress & Hosting)
Before you can harness the power of WooCommerce, you need a solid foundation. This first crucial step in our WooCommerce tutorial involves setting up your basic web presence with WordPress, which means securing a domain name and reliable web hosting. These are the non-negotiable building blocks for your future eCommerce website.
Your domain name is your online address (e.g., youramazingstore.com) and a core part of your brand. Choose something that is memorable, reflects your business, and is easy for customers to type and recall. Once you have some ideas, you’ll need to register an available domain through a domain registrar or, often more conveniently, through your chosen hosting provider.
Understanding Your Domain Name
Think of your domain name as the sign above your virtual shop door. It should be catchy, relevant, and ideally, easy to protect as a trademark down the line. Consider using keywords related to your niche if it makes sense and doesn’t make the name too clunky or long. Simplicity and brandability are key here.
Many hosting providers offer a free domain name for the first year when you sign up for a hosting plan, which can be a good perk for those just starting out. Ensure you understand the renewal costs for the domain after the initial period.
Choosing the Right Web Hosting
Web hosting is the service that stores your website’s files and makes them accessible on the internet. For an eCommerce website, especially one you intend to grow, choosing the right hosting is critical for performance, security, and reliability. As you start selling online, your site will need to handle product images, customer data, and transaction processes smoothly.
Here’s a quick rundown of common hosting types suitable for beginners aiming to use WooCommerce:
- Shared Hosting: This is often the most budget-friendly option, where your website shares server resources (like CPU, RAM) with many other websites. It’s a decent starting point for brand-new sites with minimal traffic, but be aware that performance can be inconsistent, especially during peak times.
- VPS (Virtual Private Server) Hosting: A significant step up from shared hosting. While still on a shared physical server, a VPS allocates a dedicated slice of resources just for your site. This offers better performance, stability, and scalability, making it a strong contender for serious eCommerce stores.
- Managed WordPress/WooCommerce Hosting: This specialized hosting is optimized specifically for WordPress and WooCommerce. Providers like Kinsta, WP Engine, and SiteGround (known for its WooCommerce-specific plans) often include features like daily backups, enhanced security, built-in caching for speed, staging environments, and expert WordPress support. While pricier than basic shared hosting, the value they provide in terms of performance and peace of mind can be well worth it for an online store.
When comparing hosts, look for excellent uptime guarantees (99.9% is standard), responsive customer support (24/7 is ideal), robust security features (including free SSL certificates – essential for encrypting data), automatic backups, and easy scalability options for when your store grows.
Installing WordPress: Your Website’s Core
Once your domain and hosting are sorted, installing WordPress is next. WordPress is the content management system (CMS) that WooCommerce runs on. It’s incredibly popular, powering a vast percentage of the internet, and known for its flexibility and user-friendliness.
Most modern web hosts offer a “one-click” WordPress installation tool through their control panel (like cPanel or Plesk). This is the easiest method for beginners. You’ll typically just need to choose your domain, set an admin username and password, and the system handles the rest.
If your host doesn’t provide a one-click installer (which is rare these days), you can download WordPress from wordpress.org and install it manually. This involves uploading the WordPress files to your server via FTP (File Transfer Protocol) and creating a database. While more technical, there are many guides available online if you need to go this route.
After WordPress is installed, you can access your website’s administrative dashboard by going to yourdomain.com/wp-admin. This dashboard is your command center where you’ll manage everything from content and appearance to plugins like WooCommerce. With WordPress in place, you’re ready for the next step: bringing WooCommerce into the picture!
⚙️ Step 2: Installing and Configuring WooCommerce for Your Online Store
With your WordPress site live, you’re now ready for the second pivotal step in this WooCommerce tutorial: installing and setting up the WooCommerce plugin itself. This is where your standard WordPress site begins its transformation into a fully functional eCommerce website, equipped to handle products, payments, and shipping.
The installation process is straightforward, even for beginners. WooCommerce is designed to integrate seamlessly with WordPress, making it relatively easy to get the basic framework of your online shop in place.
Seamless WooCommerce Installation
From your WordPress dashboard (remember, yourdomain.com/wp-admin), look for the “Plugins” option in the left-hand navigation menu. Click on it, and then select “Add New.” This will take you to the WordPress plugin directory.
In the search bar on the top right, type “WooCommerce.” The official WooCommerce plugin, usually developed by “Automattic” (the company behind WordPress.com and key contributors to WooCommerce), should appear as one of the first results. It’s a widely trusted and actively maintained plugin. Click the “Install Now” button. WordPress will automatically download and install the plugin files onto your server. This might take a moment.
Once the installation is complete, the “Install Now” button will change to “Activate.” Click this “Activate” button. Congratulations! WooCommerce is now active on your website.
Navigating the Setup Wizard
Upon activation, WooCommerce typically launches a helpful setup wizard. This wizard is designed to guide you through the initial configuration of your new online store, making it much less daunting to start selling online. It’s highly recommended that beginners go through this wizard.
The setup wizard will ask you a series of questions to configure the basic settings:
- Store Details: You’ll provide your store’s address, country, and the currency you’ll be using. This information is crucial for calculating taxes and shipping.
- Industry: Selecting your industry can help WooCommerce suggest relevant extensions or features later on.
- Product Types: Indicate what kind of products you plan to sell (e.g., physical products, digital downloads, subscriptions, memberships, bookings). This helps tailor some of the initial setup.
- Business Details: Questions about how many products you plan to display and whether you’re already selling elsewhere.
- Theme: The wizard might suggest themes compatible with WooCommerce. You can choose one here or stick with your current theme and change it later.
- Optional Features: You may be prompted to install free, recommended extensions like WooCommerce Payments (for integrated payment processing), WooCommerce Shipping (for USPS/DHL label printing), Jetpack (for security and performance), or MailPoet (for email marketing). You can choose to install these or skip them for now.
Don’t feel pressured to get everything perfect in the setup wizard. All these settings can be adjusted later from the main WooCommerce settings pages in your WordPress dashboard. The wizard is simply there to get you up and running quickly.
Essential WooCommerce Settings
After the setup wizard (or if you skipped it), it’s a good idea to familiarize yourself with the main WooCommerce settings area. You can find this by navigating to “WooCommerce” > “Settings” in your WordPress dashboard. This area is divided into several tabs:
- General: Here you can update your store address, selling locations (which countries you sell to), shipping locations, default customer location, and currency options (like currency symbol position, thousand separator).
- Products: Control shop page display, placeholder image settings, units for weight and dimensions, and enable/disable product reviews. The “Inventory” sub-tab lets you manage stock options, notifications for low/out of stock, and stock visibility. “Downloadable products” settings control file download methods and access restrictions.
- Shipping: This is where you’ll configure shipping zones, shipping methods (Flat Rate, Free Shipping, Local Pickup), and shipping options like calculations on the cart page. (More on this in Step 5).
- Payments: Enable and manage your payment gateways (e.g., PayPal, Stripe, Bank Transfer). (More on this in Step 5).
- Accounts & Privacy: Configure options related to customer accounts, guest checkout, and privacy policy display. For example, you can allow customers to create accounts during checkout or on the “My Account” page.
- Emails: Customize the various transactional emails sent to customers (order confirmations, shipping updates) and to store administrators (new order notifications). You can change sender options, email templates, and header images.
- Integration: Settings for integrating with third-party services (often for specific plugins like MaxMind Geolocation).
- Advanced: Contains important settings like page setup (defining which pages act as your Shop, Cart, Checkout, My Account, and Terms and Conditions pages), REST API access (for developers), and Webhooks.
Take some time to click through these tabs and understand the options available. Getting these core settings right is fundamental to how your eCommerce website will function.
I will continue to revise the rest of the article to follow this 7-step structure, ensuring the detailed content from the original document (rephrased and updated) is logically placed under these new, clearer step headings. This will make the article more actionable and align perfectly with the SEO title.
This is a significant structural change, so I’ll proceed by modifying the H2 and relevant H3 headings and then ensuring the content flows logically under this new 7-step framework.
(Continuing the revision of the full article to match the 7-step structure as outlined above. This will involve careful re-organization of the previously generated text.)
Here is the rest of the revised article, ensuring the 7-step structure is consistently applied:
🎨 Step 3: Designing Your Stunning and User-Friendly Storefront
First impressions are everything in the digital world. The visual appeal and usability of your eCommerce website are critical for capturing attention, building trust, and guiding customers towards making a purchase. This third step in our WooCommerce tutorial focuses on choosing the right theme and customizing your store’s design to create an engaging shopping experience.
A well-designed store not only looks professional but also makes it easy for customers to find what they’re looking for, ultimately leading to more sales as you start selling online.
Choosing the Perfect WooCommerce Theme
A WordPress theme controls the overall design and layout of your website. When selecting a theme for your WooCommerce store, it’s crucial to choose one that is specifically built or highly compatible with WooCommerce. This ensures that all eCommerce-specific pages like product listings, individual product pages, cart, and checkout are styled correctly and function flawlessly.
Key factors to consider when choosing a theme:
- WooCommerce Compatibility: This is non-negotiable. The theme developer should explicitly state that it supports the latest version of WooCommerce.
- Responsiveness: Your store must look and work perfectly on all devices – desktops, laptops, tablets, and smartphones. A significant amount of online shopping happens on mobile devices.
- Speed and Performance: A lightweight, well-coded theme will contribute to faster loading times. Slow sites frustrate users and can negatively impact your search engine rankings.
- Customization Options: Look for themes that offer flexibility in terms of changing colors, fonts, layouts, and header/footer styles without needing to write code. The WordPress Customizer is where most of these options will be.
- User Reviews and Support: Opt for themes from reputable developers with positive reviews and a track record of providing good customer support and regular updates (which are important for security and compatibility).
Popular and well-regarded WooCommerce-friendly themes include:
- Storefront: The official theme from the creators of WooCommerce. It’s free, lightweight, and offers a solid foundation with many available child themes and extensions for deeper customization. Excellent for beginners.
- Astra: A very popular, fast, and highly customizable multipurpose theme with excellent WooCommerce integration and starter templates.
- OceanWP: Another flexible and lightweight theme with deep WooCommerce integration and many free and premium extensions.
- Premium themes from marketplaces like ThemeForest can offer highly specific designs, but always vet them carefully for code quality and support.
You can browse and install themes directly from your WordPress dashboard under “Appearance” > “Themes” > “Add New.”
Customizing Your Store’s Appearance
Once you’ve installed and activated your chosen theme, the next step is to customize it to reflect your brand’s identity. Most theme customization options can be found in the WordPress Customizer (Appearance > Customize). This provides a live preview of your changes as you make them.
Common customization areas include:
- Site Identity: Upload your logo, set your site title and tagline, and add a site icon (favicon).
- Colors & Typography: Choose a color scheme that aligns with your brand and select fonts that are readable and match your style.
- Header & Footer: Customize the layout and content of your site’s header (often containing your logo and navigation menu) and footer (for links like contact, policies, social media).
- Menus: Create and assign navigation menus to help customers easily browse your site and product categories.
- WooCommerce Settings: Many themes offer specific WooCommerce sections in the Customizer to control the appearance of your shop page, product archives, single product pages, and checkout. You might be able to adjust the number of products per row, enable/disable sidebars, or change button styles.
Take your time to explore all the options your theme provides. A consistent and professional look is vital for building trust with your customers.
Using Page Builders for Unique Designs
If you want more granular control over your page layouts beyond what your theme offers through the Customizer, a drag-and-drop page builder plugin can be incredibly powerful. Page builders allow you to create complex and custom page designs without needing to write any code.
Popular page builders that work well with WooCommerce include:
- Elementor: One of the leading WordPress page builders, Elementor offers a free version with basic functionality and a Pro version with extensive WooCommerce-specific widgets. You can design custom headers, footers, product page layouts, archive pages, and more.
- Divi Builder (from Elegant Themes): Comes with the Divi theme but can also be used as a standalone plugin. It provides a visual, front-end editing experience and many modules for creating rich layouts.
- Beaver Builder: Known for its clean code and reliability, Beaver Builder is another excellent option for creating custom designs.
Using a page builder can help your eCommerce website stand out with a unique design. However, be mindful of performance – overly complex designs with too many elements can sometimes slow down your site. Always prioritize a clean, user-friendly experience.
🛍️ Step 4: Adding and Showcasing Your Products Like a Pro
With your store designed, it’s time to populate it with what you want to sell! This fourth step in our WooCommerce tutorial is all about adding and managing your products. Clear, attractive, and well-organized product listings are fundamental to converting visitors into customers on your eCommerce website.
WooCommerce is flexible enough to handle various product types, from simple physical goods to complex configurable items or digital downloads.
Understanding WooCommerce Product Types
Before you start adding products, it’s helpful to understand the different types WooCommerce supports:
- Simple Product: This is the most common type and covers a single, tangible item that is shipped and has no variations. For example, a specific book title or a particular model of a coffee mug.
- Variable Product: Ideal for items that come in multiple options or variations, such as size (Small, Medium, Large), color (Red, Blue, Green), or material. Each combination (e.g., a Large, Red T-shirt) can have its own unique SKU, price, stock level, and even image.
- Grouped Product: A collection of related simple products that are displayed together on a single product page but can be purchased individually. For instance, a set of “Desk Essentials” might group a lamp, a pen holder, and a notepad, allowing customers to add one or all to their cart.
- External/Affiliate Product: If you’re promoting products sold on another website (as an affiliate), you can list them in your store. Instead of an “Add to Cart” button, customers will see a button that directs them to the external seller’s site to make the purchase.
- Digital/Downloadable Product: Used for intangible items like eBooks, software, music files, photos, or PDF guides. WooCommerce can manage secure file access and download links for customers after purchase. You can also mark these as “Virtual” if no shipping is required.
Choosing the correct product type from the outset will make managing your inventory and presenting options to your customers much easier.
The Art of Adding a New Product
To add a product to your WooCommerce store, navigate to “Products” > “Add New” in your WordPress dashboard. You’ll then see an interface with various fields and sections to complete:
- Product Name: Enter a clear, descriptive, and appealing title for your product. This is what customers will see first.
- Main Product Description: This is the large text editor area. Provide comprehensive details about your product here – its features, benefits, materials, dimensions, care instructions, and any unique selling points. Use formatting like headings, bullet points, and bold text to make it easy to read. Tell a story about your product if appropriate.
- Product Data Section: This is a crucial meta box, usually below the main description editor. Here, you’ll first select the “Product type” from the dropdown (Simple, Variable, etc.). Based on your selection, different tabs will appear:
- General Tab: For Simple products, you’ll set the “Regular price” and an optional “Sale price” (which can be scheduled for a specific period). For Downloadable products, you’ll add file paths and download limits here.
- Inventory Tab: Assign a unique SKU (Stock Keeping Unit) for tracking. You can enable stock management to input the “Stock quantity,” choose to “Allow backorders?” (None, Allow but notify customer, or Allow), and set a “Low stock threshold” for notifications.
- Shipping Tab: Input the product’s weight and dimensions (length, width, height). This information can be used by shipping calculator plugins. You can also assign a “Shipping class” if you’ve set them up for different shipping rate calculations.
- Linked Products Tab: Suggest “Upsells” (higher-value alternatives) and “Cross-sells” (related products often bought together, typically shown on the cart page).
- Attributes Tab: Define product characteristics like color, size, or material. For Variable products, these attributes will be used to create the variations. Make sure to check “Used for variations” if that’s your intent.
- Variations Tab (Only for Variable Products): Once attributes are defined and marked for variations, you can generate all possible combinations (e.g., Small/Red, Medium/Red). For each variation, you can set a unique image, SKU, price, sale price, stock quantity, weight, and dimensions.
- Product Short Description: This is a concise summary that usually appears near the product title and price, above the “Add to Cart” button. It should be compelling and highlight key benefits quickly.
- Product Categories: On the right-hand side, assign your product to one or more categories (e.g., “Clothing > Men’s > T-Shirts”). Categories help organize your store and make it easier for customers to browse.
- Product Tags: Also on the right, add relevant tags (e.g., “cotton,” “summer,” “graphic tee,” “eco-friendly”). Tags offer another way to filter and find products and can be more specific than categories.
- Product Image (Featured Image): Set the main image for your product. This is displayed on the shop page and is the primary image on the product details page.
- Product Gallery Images: Add additional images to showcase your product from different angles, in use, or highlighting specific details.
High-quality product photography is paramount. Use clear, well-lit images with a consistent style. Show your products in their best light!
Managing Inventory and Variations
Accurate inventory management is crucial when you start selling online to avoid overselling or disappointing customers. WooCommerce’s built-in stock management tools allow you to track quantities for simple products and individual variations of variable products.
When “Manage stock?” is enabled for a product (or variation), you can enter the current quantity. WooCommerce will automatically decrease this number when an item is sold and can prevent sales if stock reaches zero (unless backorders are allowed). You can also receive email notifications when stock for an item reaches the “Low stock threshold” you set.
For variable products, managing variations efficiently is key. Ensure each variation has its distinct SKU, price, and stock level if they differ. You can also set a default variation that is pre-selected when a customer visits the product page.
Regularly review your stock levels and update them as needed, especially if you also sell through other channels (like a physical store or marketplaces). For more advanced inventory needs, such as managing stock across multiple warehouses or complex kitting/bundling, dedicated inventory management plugins or systems might be necessary as your business grows.
💳 Step 5: Crucial Commerce Setups: Payments and Shipping Solutions
No online store can function without ways to accept money and get products to customers. This fifth step in our WooCommerce tutorial covers the essential setups for payment gateways and shipping methods. Getting these right is critical for a smooth customer experience and the operational efficiency of your eCommerce website.
These are the transactional heart of your business when you start selling online, so careful configuration and testing are vital.
Integrating Secure Payment Gateways
A payment gateway is a service that securely processes online payments made by your customers. WooCommerce supports a wide array of payment gateways, allowing you to offer convenient and trusted payment options.
WooCommerce comes with several core payment methods built-in:
- Direct Bank Transfer (BACS): Customers get your bank details to make a manual transfer. You confirm payment before processing the order.
- Check Payments: Customers mail a check; you process the order after the check clears.
- Cash on Delivery (COD): Customers pay in cash upon receiving their order.
While these are options, most modern eCommerce stores rely on integrated online payment processors for instant and secure transactions. Popular choices for WooCommerce users include:
- PayPal: Globally recognized and trusted. Many customers have PayPal accounts, which can speed up checkout. WooCommerce integrates well with various PayPal services, from standard redirects to more seamless on-site solutions like PayPal Payments.
- Stripe: A powerful and versatile payment gateway that allows customers to pay with credit/debit cards, Apple Pay, Google Pay, and numerous other local payment methods directly on your site without redirection. Known for its excellent developer tools and security.
- WooCommerce Payments: Developed by Automattic (the team behind WooCommerce), this is a deeply integrated solution built on top of Stripe, offering a streamlined way to accept cards, manage transactions, and handle disputes directly within your WordPress dashboard. It’s a great option for simplicity and tight integration.
- Other gateways like Square, Authorize.Net, and Amazon Pay also have WooCommerce integrations, often via dedicated plugins.
To configure a payment gateway:
- Typically, you’ll first create an account with the payment gateway provider (e.g., Stripe or PayPal).
- Install the corresponding WooCommerce plugin for that gateway (many official ones are free).
- Navigate to WooCommerce > Settings > Payments in your WordPress admin area.
- Enable the gateway you want to use.
- Click “Manage” or “Set up” next to the gateway and enter the required API keys or connect your account as prompted. You can usually customize the title and description customers see at checkout.
Security is paramount. Always ensure your site has an active SSL certificate (HTTPS) to encrypt payment information. Most modern gateways (like Stripe and PayPal) handle the most sensitive card data on their own secure servers, which helps reduce your PCI DSS (Payment Card Industry Data Security Standard) compliance burden. However, always follow security best practices. Offering a couple of well-known, trusted payment options is generally a good strategy.
Configuring Shipping Zones and Methods
Shipping is a make-or-break aspect of eCommerce. Clear options, fair prices, and reliable delivery are essential. WooCommerce’s shipping settings are managed primarily through Shipping Zones. A shipping zone is a geographical area to which you ship (e.g., “United States,” “California,” “Europe”).
To set up your shipping:
- Go to WooCommerce > Settings > Shipping.
- Click “Add shipping zone.”
- Give your zone a name (e.g., “Domestic Standard”).
- Select the “Zone regions” – you can pick countries, states/provinces, or even list specific postal codes. For regions not covered by your defined zones, you can have a “Rest of the World” zone.
- Once a zone is defined, click “Add shipping method” within that zone.
WooCommerce offers three default shipping methods you can add to each zone:
- Flat Rate: Charge a fixed cost for shipping within that zone. This can be a single rate per order (e.g., $5), a rate per item, or you can use percentages or more complex calculations based on “shipping classes” (e.g., “Bulky Items” shipping class has a higher flat rate).
- Free Shipping: Offer free shipping, which can be a powerful incentive. You can set conditions for free shipping, such as:
- A minimum order amount (e.g., “Free shipping on orders over $75”).
- A valid free shipping coupon.
- A combination of both.
- Local Pickup: Allow customers to collect their orders from your physical location (if you have one), waiving shipping fees. You can specify a cost for this if needed, though it’s usually free.
For more advanced shipping needs, such as real-time carrier-calculated rates (from USPS, FedEx, UPS, DHL), printing shipping labels directly from WooCommerce, or complex table-based rates (e.g., rates based on weight tiers and destination), you’ll often need to install additional shipping plugins or extensions. Many carriers and shipping services like ShipStation offer robust WooCommerce integrations.
When configuring shipping, ensure your product dimensions and weights are accurately entered in the “Product Data” section for each product, as these are often used for calculating rates, especially with carrier integrations. Clearly communicate your shipping costs and estimated delivery times on your product pages and during checkout to avoid surprises for your customers. Thoroughly test your shipping rules for various cart contents and destinations before launching.
📢 Step 6: Marketing Your New Store and Attracting Your First Customers
You’ve built your eCommerce website, stocked it with products, and figured out payments and shipping. Now for the exciting part: getting the word out and attracting customers! This sixth step in our WooCommerce tutorial is all about marketing your store and making those first crucial sales as you start selling online.
Effective marketing is an ongoing effort, but here are some foundational strategies for beginners.
SEO Basics for Your eCommerce Website
Search Engine Optimization (SEO) is the art and science of getting your website to rank higher in search engine results (like Google or Bing) for terms relevant to your products. Good SEO drives “organic” (free) traffic to your store.
- Keyword Research: Understand what search terms your potential customers are using to find products like yours. Tools like Google Keyword Planner (free with a Google Ads account), Ubersuggest, or Ahrefs (paid) can help.
- On-Page SEO:
- Product Titles & Descriptions: Naturally incorporate your target keywords into your product titles and detailed descriptions. Make them unique and compelling for both search engines and humans.
- Category & Tag Pages: Optimize the names and descriptions of your product categories and tags.
- Meta Descriptions: Write enticing meta descriptions for your pages and products. These are the short snippets that appear under your title in search results.
- URLs: Use clean, descriptive URLs (e.g.,
yourstore.com/category/product-name). - Image Alt Text: Provide descriptive alt text for all your product images, including keywords where appropriate. This helps with image search and accessibility.
- Technical SEO:
- Site Speed: A fast-loading website is crucial. Optimize images, leverage browser caching, and choose good hosting.
- Mobile-Friendliness: Your store must be fully responsive and easy to use on mobile devices. Google prioritizes mobile-friendly sites.
- XML Sitemap: Submit an XML sitemap to Google Search Console. This helps Google discover and index all the pages on your site. Plugins like Yoast SEO or Rank Math can generate this for you.
- SEO Plugins: As mentioned before, tools like Yoast SEO or Rank Math are invaluable. They integrate with WooCommerce to help you optimize product data, create better XML sitemaps for products, and manage other SEO settings easily.
Content and Email Marketing Strategies
- Content Marketing (Blogging): Start a blog on your WooCommerce site. Write helpful articles, guides, tutorials, or stories related to your products, your industry, or the problems your products solve. This attracts visitors interested in your niche, establishes your expertise, and provides more opportunities to rank for relevant keywords.
- Email Marketing: Building an email list is one of the most effective long-term marketing strategies.
- Collect Emails: Offer an incentive for visitors to subscribe to your newsletter (e.g., a 10% discount on their first order, a free guide). Use signup forms in your footer, pop-ups (used judiciously), or during checkout.
- Welcome Series: Automate a series of emails to welcome new subscribers, introduce your brand, and highlight popular products.
- Promotional Emails: Send out emails about new arrivals, special offers, sales, or seasonal promotions.
- Abandoned Cart Emails: A significant percentage of shoppers abandon their carts. Set up automated emails to remind them about the items they left behind, perhaps with a small encouragement (like free shipping) to complete the purchase.
- Email Marketing Platforms: Integrate WooCommerce with an email marketing service like Mailchimp, Klaviyo (excellent for eCommerce), or Sendinblue (now Brevo). These platforms help you manage your lists, design emails, and automate campaigns. Many have direct WooCommerce integration plugins.
Leveraging Social Media and Basic Promotions
- Social Media Presence: Identify where your target audience spends their time online (e.g., Instagram for visual products, Facebook for broad appeal, Pinterest for lifestyle and DIY, TikTok for engaging video content). Create business profiles on these platforms.
- Share high-quality images and videos of your products.
- Post engaging content that resonates with your audience (behind-the-scenes, user-generated content, tips, etc.).
- Run contests or giveaways to boost engagement and reach.
- Interact with your followers – respond to comments and messages.
- Utilize social commerce features like Instagram Shopping or Facebook Shops, which allow users to browse and purchase your products directly from the social media platform or easily click through to your store.
- Promotions and Coupons: WooCommerce has built-in coupon functionality (Marketing > Coupons). You can create various types of discounts:
- Percentage discount (e.g., 15% off).
- Fixed cart discount (e.g., $10 off the total).
- Fixed product discount (e.g., $5 off a specific item).
- Free shipping.
- Set usage limits, expiry dates, and minimum/maximum spend requirements for coupons. Promote your coupon codes through email, social media, or on your website.
- Customer Reviews: Encourage customers to leave reviews on your product pages. Positive reviews build social proof and trust, which can significantly influence purchasing decisions. WooCommerce has a built-in review system.
Marketing is about consistent effort and learning what resonates with your audience. Start with these basics, track your results using tools like Google Analytics, and refine your strategies over time.
🚀 Step 7: Managing Daily Operations, Ensuring Security, and Planning for Growth
You’ve launched! Customers are visiting, and hopefully, orders are coming in. This final step in our 7 astonishing steps of the WooCommerce tutorial is about the ongoing, crucial tasks of managing your day-to-day operations, keeping your eCommerce website secure, and strategically planning for future growth as you successfully start selling online.
This stage is about maintaining momentum, ensuring customer satisfaction, and building a sustainable business.
Handling Orders and Customer Communication
Efficient order management is key to keeping customers happy and encouraging repeat business.
- Order Processing Workflow: When a new order arrives (you’ll see it in WooCommerce > Orders), your workflow might look like this:
- Verify payment (if not automatic).
- Check inventory.
- Pick and pack the products carefully.
- Arrange shipping and print labels (often done via integrated shipping plugins).
- Update the order status in WooCommerce (e.g., from “Processing” to “Completed”). This usually triggers an email notification to the customer with shipping/tracking information.
- Managing Order Statuses: Familiarize yourself with WooCommerce order statuses (Pending payment, Processing, On Hold, Completed, Cancelled, Refunded, Failed) and use them accurately.
- Customer Communication: Keep your customers informed. WooCommerce sends automated emails for order confirmation, completion, etc. You can customize these under WooCommerce > Settings > Emails. Respond promptly and professionally to any customer inquiries, whether they come via email, contact form, or social media.
- Handling Returns and Refunds: Have a clear returns and refunds policy published on your site. WooCommerce allows you to process refunds directly from the order details page. Handle these situations fairly and efficiently to maintain customer trust.
Essential Security Measures for Your Store
Security is not a set-it-and-forget-it task; it requires ongoing vigilance.
- Regular Updates: This is paramount. Keep WordPress core, WooCommerce, all your themes, and all your plugins updated to their latest versions. Updates frequently include patches for security vulnerabilities.
- Strong Passwords & User Roles: Use strong, unique passwords for all admin accounts. Limit access by assigning appropriate user roles (e.g., don’t give everyone administrator access).
- Security Plugin: Use a reputable security plugin like Wordfence Security or Sucuri Security. These offer firewalls, malware scanning, login protection (like two-factor authentication and limiting login attempts), and more.
- Regular Backups: Ensure you have an automated backup system in place (e.g., using UpdraftPlus) that regularly backs up your entire site (files and database) to an off-site location (like Google Drive or Dropbox). Test your restore process periodically.
- SSL Certificate (HTTPS): Your site must use HTTPS to encrypt data, especially for an online store.
- Secure Hosting: A good hosting provider will have server-level security measures in place.
Maintaining and Scaling Your WooCommerce Business
- Ongoing Maintenance:
- Performance Checks: Regularly monitor your site speed.
- Database Optimization: Periodically clean up your WordPress database.
- Broken Link Checks: Fix any broken links on your site.
- Content Review: Keep product information, pricing, and static pages (About, FAQ, Policies) up to date.
- Analytics Review: Regularly check your Google Analytics and WooCommerce reports. Understand your traffic sources, best-selling products, conversion rates, and customer behavior. Use these insights to make informed decisions.
- Listen to Customer Feedback: Pay attention to reviews, comments, and direct feedback. This is invaluable for improving your products and services.
- Planning for Growth (Scaling):
- Hosting Scalability: As your traffic and order volume grow, ensure your hosting plan can handle it. You might need to upgrade from shared hosting to a VPS or managed WooCommerce hosting.
- Performance Optimization for Scale: Techniques like using a Content Delivery Network (CDN), advanced caching, and database optimization become even more critical.
- Streamlining Operations: Look for ways to automate repetitive tasks in order fulfillment, inventory management, and customer service.
- Expanding Product Lines or Markets: Based on your success and market research, you might consider adding new products or exploring international sales.
- Building a Team: As you grow, you might need to hire help for customer service, marketing, or fulfillment.
Running a WooCommerce store is a continuous cycle of selling, managing, learning, and improving. By staying organized, prioritizing security, and always looking for ways to enhance the customer experience and your operational efficiency, you can build a truly successful and scalable online business.
🔮 Your eCommerce Journey: Final Thoughts and Next Moves
Congratulations on making it through this comprehensive WooCommerce tutorial! You now possess a solid foundation and the knowledge of 7 astonishing steps to confidently start selling online and build a thriving eCommerce website. The path of an online entrepreneur is filled with learning, challenges, and immense rewards. Remember that launching your store is just the first step in an ongoing adventure.
The digital marketplace is dynamic. Trends will change, new technologies will emerge, and customer expectations will evolve. Your ability to adapt, learn continuously, and remain customer-focused will be the cornerstones of your long-term success. Don’t be afraid to experiment with new marketing strategies, product offerings, or store designs. Use data and customer feedback to guide your decisions and iterate on what works.
WooCommerce, with its flexibility and vast ecosystem of themes and plugins, is an excellent partner for this journey. It can scale with your business, from a small boutique to a large online enterprise. Leverage the vibrant WooCommerce community for support, insights, and inspiration. Join forums, attend meetups (virtual or physical), and never stop exploring ways to enhance your store and your skills.
Building an online business takes dedication, perseverance, and a passion for what you do. There will be triumphs and setbacks. Celebrate your successes, learn from your mistakes, and keep pushing forward towards your goals. Your unique vision and hard work are what will ultimately shape your online empire.
We wish you the very best as you embark on or continue your eCommerce journey with WooCommerce. May your store flourish, your customer base grow, and your entrepreneurial dreams become a reality!
Reference video:


