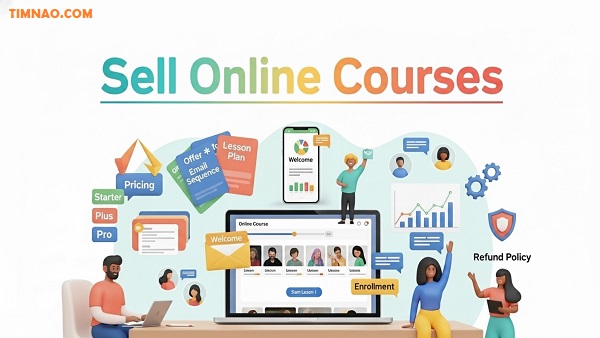
Sell Online Courses Without the Stress: Proven Moves for Beginners 🚀
Sell online courses without the stress—starting today. If you’ve ever wondered how to turn your know-how into a simple, market-ready product that people actually finish, this beginner-friendly guide is for you. You’ll learn the exact steps to validate your idea, package a clear outcome, and launch with confidence—without fancy tech or a big audience.
Think of this as your practical playbook for course marketing that feels authentic, not pushy. We’ll show you how to attract the right learners, price with confidence, and build a straightforward system that turns interest into enrollments. Along the way, you’ll see real examples, copy-and-paste prompts, and bite-sized actions designed for the busy beginner course creator.
By the end, you’ll know how to test demand in days, create short lessons that drive results, and use email and content to sell online courses consistently. Ready to turn your expertise into a course that delivers real outcomes—and real revenue? Let’s dive in.
Table of Contents
- 🎯 What It Really Takes to Sell Online Courses
- 🧭 Nail Your Outcome & Audience (Before You Build)
- 🔎 Find the Right Course Idea: Passion × Proof
- ⚡ Validate Fast: Prototypes, Waitlists & “Mini Wins”
- 📚 Learning Design That Sticks (Even for Busy People)
- 🧰 Assets That Add Value: Templates, Checklists & Communities
- 💰 Price With Confidence (Without Feeling “Salesy”)
- 👤 Build Trust: Brand, Proof & Positioning
- 🧱 Choose Your Platform Stack (Tools That Play Nice)
- 🛒 Craft a Sales Page That Converts
- 🎥 Modern Content Marketing: Shorts, Lives & Long-Form
- ✉️ Email That Actually Works (List-Building & Sequences)
- 🚀 Launch Playbooks: Live, Evergreen & Hybrid
- 🤝 Keep Students Engaged: Completion, Community & Momentum
- 📈 Measure What Matters (Metrics, Benchmarks & Dashboards)
- 🤖 Automate & Outsource Smartly
- ⚖️ Legal & Ethical Foundations (Make Good Promises)
- 🧯 Common Pitfalls & How to Fix Them
- 🗓️ Your 30-Day Beginner Action Plan
- 🙋 FAQs: Beginner Questions About Sell Online Courses Answered
- ✅ Key Lessons & Takeaways
🎯 What It Really Takes to Sell Online Courses
The real job behind the sale
Sell online courses without the overwhelm—that’s the goal. But what does it actually take? Not a fancy studio or a giant audience. What you need is a clear outcome, credible proof, and a repeatable system that helps a specific type of learner reach a specific result. Your job is to reduce friction: shorter lessons, easier actions, and fewer decisions. When you design for momentum, selling becomes a byproduct of helping.
Think of selling as an ongoing conversation. People buy when they feel understood, see a believable path, and trust you won’t waste their time. That means you’ll focus less on hype and more on tiny, visible wins—the kind learners can achieve this week. When those wins stack, your course’s value becomes obvious.
To keep your energy high, adopt a “build one rung at a time” approach. Start with a minimum version: a short workshop, a simple outline, a one-page site, and a few emails. Each step should teach you something about your audience. Every improvement you make should be grounded in what learners actually do, not what we hope they’ll do.
Time, skills, and the realistic beginner setup
As a beginner, you’ll juggle three skill buckets: teaching (designing clear steps), marketing (finding and inviting the right people), and ops (getting tech to play nice). You don’t have to master everything. Keep it light:
- Website/SEO: WordPress + Rank Math or a simple page builder.
- Course host: Teachable, Thinkific, or Kajabi.
- Payments: Stripe or PayPal.
- Email: ConvertKit or Mailchimp.
- Utilities: Canva for visuals, Calendly for calls, Zapier for basic automation, Notion for planning.
Block 4–6 hours/week: 1–2 hours building materials, 1–2 hours talking to learners, 1–2 hours marketing. Protect this small routine and you’ll outpace most course creators who start and stop.
The mindset that makes selling easier
Selling is simpler when your promise is honest and your process is practical. Your learners are busy, distracted, and skeptical. Respect that by removing complexity and showing quick progress. If every touchpoint—from your social posts to your welcome email—creates value on its own, people naturally lean in.
Now let’s lock in the two foundations that make everything else work: a sharp outcome and a well-defined audience.
🧭 Nail Your Outcome & Audience (Before You Build)
Craft a transformation sentence that buyers believe
A transformation sentence tells prospects exactly where they’ll end up and when. Use this starter formula:
“In X weeks, [specific learner] will [achieve concrete outcome] without [pain they fear].”
Examples:
- “In 30 days, new Etsy sellers will launch a polished shop and get their first 10 sales without burning out on social media.”
- “In 14 days, freelance designers will book 2 discovery calls with cold email without sounding pushy.”
Make your outcome observable (a launched site, booked calls, delivered draft) instead of vague (“learn”, “understand”). Observable outcomes feel safer to buy because progress is visible.
Describe a real person, not a demographic
Demographics don’t buy—jobs to be done do. Write a short portrait of one learner and the job they’re hiring your course to complete:
- Trigger: “I’m stuck picking a niche.”
- Desired progress: “I want a clear offer so I can pitch this week.”
- Constraints: “I have 5 hours/week and zero ad budget.”
- Emotional stakes: “I’m afraid I’ll look unprofessional.”
This portrait will steer your curriculum and copy. If a lesson doesn’t help this person move forward this week, cut it or move it later.
Map obstacles and design “quick wins”
List the top three blockers your learner faces, then pair each with a quick win:
- Blocker: “I don’t know what to teach.”
Quick win: 15-minute “idea sweep” worksheet that surfaces 5 topics you’ve done repeatedly. - Blocker: “I’m not sure anyone will buy.”
Quick win: One-page waitlist + two-question survey to gather intent. - Blocker: “Tech scares me.”
Quick win: A prebuilt landing page template and a 10-minute tutorial to publish it.
Start your course with these quick wins so learners feel momentum on day one. Momentum is your best sales engine: progress stories travel fast.
Define a finish line and the “done-for-now” scope
Scope creep kills completion. Define a finish line your learner can reach in the promised time. If they can go further, great—but your course should deliver a self-contained victory. Example: “By the end of Week 2, your one-page offer is live and you’ve sent 20 outreach messages.”
With a crisp outcome and a real person in mind, it’s time to pick the strongest idea—one that balances your energy with real demand.
🔎 Find the Right Course Idea: Passion × Proof
Use the Passion × Proof grid to shortlist ideas
List 5–7 topics you could teach. Score each on two axes:
- Passion/Energy (1–5): Do you enjoy teaching this? Will you still enjoy it after 20 questions?
- Proof of Demand (1–5): Are people already searching, asking, and buying around this topic?
Add the scores. Ideas that land 7+ deserve a closer look.
Where to spot demand quickly:
- Search behavior: Type your topic into YouTube and note “People also searched for…” questions.
- Community questions: Scan Reddit subforums and relevant Facebook or Discord groups for repeated pain points.
- Market hints: Look at course marketplaces to see which titles, formats, and promises draw reviews.
- Trend sanity check: Use Google’s free trends tool to see if interest is stable or seasonal.
You’re not trying to be the only one teaching the topic. You’re trying to offer the clearest, quickest path for your specific learner.
The “60-minute win” stress test
Before you commit, ask: What can a beginner accomplish in 60 minutes with my guidance? If you can’t answer clearly, the idea might be too broad. Examples that pass the test:
- “Build a one-page notion system to run your side hustle.”
- “Record and publish your first podcast trailer.”
- “Write and schedule three client outreach emails.”
These immediate wins double as lead magnet workshops and course previews. If the mini result resonates, the bigger course likely will too.
Differentiate with your lens, not your length
Standing out isn’t about adding more modules. It’s about the angle you take and the constraints you use. Examples:
- Audience constraint: “Podcasting for therapists with limited time.”
- Tool constraint: “Landing pages built only with Canva + a simple site.”
- Time constraint: “30-minute daily drills to get your first 2 clients in 2 weeks.”
Constraints build trust. They signal that you’ve made decisions to help learners move faster.
Choose the top one idea (for now)
Pick one idea to lead with—the one that feels energizing, shows clear demand, and passes the 60-minute test. Archive the rest. You can always return later, but focus is your unfair advantage right now.
With a sharp idea in hand, validate it quickly so you don’t spend weeks building the wrong thing.
⚡ Validate Fast: Prototypes, Waitlists & “Mini Wins”
Your one-page landing page (fast and lightweight)
Build a simple page to describe your promise, show your path, and collect emails. Keep it to the essentials:
- Headline: Your transformation sentence.
- Subhead: Who it’s for + the first win they’ll get.
- What you’ll cover: 3–5 bullet outcomes framed as actions (“Pick a niche”, “Publish a one-page offer”).
- Credibility cue: A short paragraph on why you care—plus any relevant experience or results.
- CTA: “Join the waitlist” or “Save your seat for the free workshop.”
- Logistics: Format (live/recorded), rough start date, time investment per week.
- Bonus: A small freebie for joining (template, checklist, or a private Q&A invite).
Use any simple stack you like: a WordPress page with Rank Math, or a lightweight builder paired with ConvertKit or Mailchimp for email capture. The point is to ship in a single sitting.
Add a two-question intent survey
Right after someone joins your list, show a tiny form:
- “What’s the number one result you want from this course?”
- “What’s the biggest obstacle in your way right now?”
These answers are gold. They help you name modules, write copy, and prioritize lessons. Pull phrases directly from responses to keep your language grounded.
Run a free “mini win” workshop to test the angle
Host a 45–60 minute live session that delivers one visible result. Use this simple outline:
- Set the promise (3 minutes): Who it’s for, what we’ll finish together, and what to expect.
- Warm-up proof (2 minutes): Share one tiny success story or a quick before/after.
- Do it together (30–35 minutes): Demo → pause → participants complete the step. Repeat in three small loops.
- Wrap with next steps (5 minutes): “Here’s how to extend this into a full system.”
- Invite (5 minutes): Introduce your upcoming course or beta cohort. Offer an early-bird incentive with a clear deadline.
- Q&A (10–15 minutes): Answer objections as real people ask them.
Record the session and send the replay to registrants. The chat transcript will reveal the language people use and the stumbling blocks you can address in your lessons.
What numbers mean “enough” to proceed
These are beginner-friendly benchmarks—adjust for your niche size:
- Waitlist sign-ups: 50–200 is a healthy signal for a focused topic.
- Workshop registrations: 30–100 with a show-up rate of ~30–40%.
- Purchase intent: If you present a beta offer at the end, aim for 5–10 sales at a starter price to validate.
If you fall short, don’t panic. Look at three levers: promise clarity, proof visibility, and audience match. Tweak the headline to name a more specific win, add a visual proof (screenshot or demo), or narrow the learner description.
Three quick validation prototypes (pick one)
If live workshops aren’t your thing, try a different fast prototype:
- Email series preview: Send a free 3-email mini-course and invite replies. Track opt-ins and response depth.
- Resource beta: Share a “toolkit” (templates + short guides) and ask who wants a deeper walkthrough course.
- Challenge sprint: Run a 3-day micro challenge with daily tasks. End with a short “What’s next” invite.
Whichever route you choose, your goal is the same: prove interest with actions, not opinions.
Decision tree: greenlight, refine, or pivot
After your prototype:
- Greenlight: You hit or exceed your benchmarks → move to building the minimum viable curriculum.
- Refine: You see interest but confusion → sharpen the promise and run one more test with a tighter angle.
- Pivot: Low engagement across the board → return to your idea list and re-run the Passion × Proof grid.
You’re never “back at zero” after a test. You’ve gathered language, learned objections, and clarified what your audience values. That learning compounds.
Your beta offer in one afternoon
When you’re ready, craft a nimble beta:
- Scope: 3–5 core modules, each with a single outcome.
- Format: Weekly live sessions + downloads; record everything.
- Price: An accessible early-bird rate in exchange for feedback and testimonials.
- Support: One live Q&A per week, plus a simple discussion space.
- Guarantee: “If you do the work and don’t see X result by Week 2, email me for a refund.”
Announce with a short email sequence: open cart, reminder with FAQs, last call. Keep it human—invite replies and offer a quick Loom walkthrough if people feel stuck.
You’ve proven demand and sold your first seats. Next, you’ll turn those signals into a streamlined curriculum and a sales page that answers every important question before it’s asked.
📚 Learning Design That Sticks (Even for Busy People)
Architect lessons for action, not admiration
Busy learners don’t need a lecture; they need a result. Design each lesson around one specific action a beginner can complete in minutes. Use the 3–3–3 rule: aim for a 3–5 minute explanation, 3–5 minute demo, and 3–5 minute “do it now” step. Keep your slides light, your examples concrete, and your to-dos crystal clear. If a concept doesn’t drive the action forward, park it in an optional “deeper dive” resource.
To make lessons “stick,” name them by the outcome, not the topic. Instead of “Email Marketing Basics,” try “Write a Welcome Email That Gets Replies.” Your learner should finish each video thinking, I built something useful, not I learned about something. That shift alone increases completion and satisfaction.
Sequence outcomes, not chapters
Start with the Quickstart—a tiny, visible win on day one. This might be publishing a waitlist page, collecting a first testimonial, or sending a first outreach message. Then arrange modules by the order of decisions a beginner must make: offer → proof → page → traffic → sales. Each step should unlock the next, like a breadcrumb trail. Avoid detours into advanced theory until the essentials are working.
Create milestone markers every 1–2 modules so learners know they’re on track. For example, after Module 2, the milestone could be “Offer live on a one-page site.” After Module 4, “10 warm outreach messages sent.” Milestones become your built-in marketing later: you’re not promising knowledge; you’re promising completed steps.
Keep cognitive load low
Beginners juggle new ideas, unfamiliar tools, and fear of messing up. Reduce their cognitive load by limiting choices and pre-configuring tools. Provide a starter template in Canva or Notion so they don’t face a blank screen. Offer default settings for email tools like ConvertKit or Mailchimp: from-name, subject formats, and sending schedule. Fewer decisions today means more progress tomorrow.
Use the teach → try → check loop. Teach the smallest useful chunk, let them try with a guided prompt, then add a quick self-check (a simple rubric: “Does your headline say who it’s for + what it does + by when?”). Short feedback loops create confidence without overwhelming the learner—or you.
Build momentum with checkpoints and accountability
Layer in checkpoints where students upload a screenshot, a short Loom, or a typed answer to three reflection questions: “What did you finish?”, “What blocked you?”, “What’s your next 15-minute step?” A weekly office hour—even 30 minutes—can transform results. Invite learners to show one small win, request feedback, and commit to the next action. Record these sessions and time-stamp highlights so future students can binge solutions fast.
Encourage peer pods of 3–5 learners. Give them a simple weekly script: share one win, one obstacle, and one commitment. No over-engineering. The goal isn’t to socialize—it’s to finish. A basic group DM or a private Discord channel is enough.
Design for real-life constraints
Assume your student is learning on a phone, in short bursts, between responsibilities. Provide downloadable audio for lessons, transcripts for skimming, and checklists that render cleanly on mobile. Keep all assets in a single hub (a Notion dashboard or your LMS resource page) and repeat the path to it in onboarding emails. Every extra click costs attention; every dead end costs trust.
With lessons that drive action and a structure that respects real life, your students will move faster. Now let’s multiply that momentum with plug-and-play assets and a simple community layer.
🧰 Assets That Add Value: Templates, Checklists & Communities
Ship plug-and-play tools, not just lessons
Templates convert curiosity into progress. Package ready-to-use files that match the exact tasks you teach: one-page sales copy, outreach scripts, content calendars, pricing calculators. Each template should include (1) a filled example, (2) a blank version, and (3) a micro-guide on how to adapt it in 5–10 minutes. If learners can copy, paste, and customize, they’ll keep going.
Aim for a Starter Kit that unlocks early wins:
- Offer Sheet (Notion/Google Docs): problem, promise, proof, price, deadline.
- Headline Swipe File: 30 outcomes-first headlines with fill-in brackets.
- Email Trio (Google Docs): welcome, value drop, soft invite.
- Sales Page Blocks (Canva): hero, outcomes, proof, pricing table.
- Mini Metrics Tracker (Google Sheets): leads, opens, clicks, sales.
Host files where permissions don’t break. For example, share view-only Google Docs with “Make a copy” instructions, or public templates in Notion. Fewer access issues mean fewer support emails.
Turn decisions into checklists and trees
Beginners stall at decision points: niche, price, tool choice. Convert these into checklists and simple decision trees. Example—Pricing Checklist: do you have an observable outcome, a timeline, support level, and bonuses? If three or more are “no,” raise support or narrow the promise before raising price. Publish these as one-pagers learners can print or keep on their phone.
Use if → then flows to prevent analysis paralysis:
- If you can only film on your phone, then use window light + built-in mic + a quiet room; keep clips under 5 minutes.
- If your email list is under 200, then run a live mini-workshop first, not an automated webinar.
- If you can’t decide between Teachable, Thinkific, and Kajabi, then pick the one that integrates easily with your email tool and Stripe.
Keep community lightweight but useful
A small community amplifies learning when it’s structured and low-maintenance. Choose one home (platform forum, a private Discord, or a gated space in your LMS). Set simple norms: show your work, give specific feedback, celebrate small wins. Seed weekly threads: Win Wednesday, Feedback Friday, Office-Hour Reminders. Pin a “Start Here” post that links to the Starter Kit, the latest replay, and the next live event.
If you want accountability without moderation overload, launch peer pods and give them a 20-minute “pod playbook”:
- 2 minutes: each member names their focus.
- 12 minutes: focused work (cameras off).
- 6 minutes: share outcomes + next step.
Bundle assets for frictionless delivery
Collect everything in a Resource Vault with clear labels and short intros. Add a searchable index (simple table with links and tags). In onboarding, send one email titled “Your Starter Kit” and include direct links to the five highest-impact files. Keep updates predictable—monthly is plenty—and announce new assets with a quick demo video.
With tools that lower effort and a community that protects momentum, the next question is price. Let’s make it fair for learners and sustainable for you—without sounding pushy.
💰 Price With Confidence (Without Feeling “Salesy”)
Start with a value ladder, not guesswork
Pricing feels scary when it’s abstract. Ground it in a value ladder with three tiers: Starter, Plus, and Pro. Starter includes the core curriculum and templates. Plus adds live Q&A, reviews, or community. Pro includes 1:1 feedback or small-group coaching. Show Pro first to establish an anchor, then highlight Plus as “Most Popular.”
Use a simple ROI or time-saved lens. Ask: “What does this course help a learner earn, save, or avoid within 30–60 days?” If you help a freelancer land even one $200 project reliably, a $149–$299 course is reasonable. If you save 10 hours of setup through templates, price to reflect the time reclaimed. Your price is a promise: the clearer the promise and delivery, the easier the sale.
Payment plans and buyer safety
Offer payment plans (e.g., 3× or 4×) to widen access while keeping your base price intact. Make terms clear: total cost, billing dates, and how access works if payments fail. Pair price with a fair guarantee: “Try the first two modules. If you complete the exercises and don’t see momentum, email us within 14 days for a refund.” Guarantees reduce perceived risk; action-based terms protect your time.
If you’re launching a brand-new offer, consider a beta cohort price in exchange for feedback and permission to use testimonials. Set expectations that pricing will rise after the beta as delivery improves. Transparency builds goodwill and urgency simultaneously.
Bonuses that increase completion (not clutter)
Bonuses should remove bottlenecks, not inflate perceived value. Good examples: a “First 10 Leads” outreach script pack, a sales page block library in Canva, or a 30-minute tech setup walkthrough using Stripe and PayPal. Time-bound bonuses (“Join by Friday to get the Sales Page Review”) create urgency without discounting your expertise.
Avoid bonus bloat. If a bonus doesn’t accelerate the promised outcome within the course timeline, it’s a distraction. Better to have one perfect bonus that unlocks a quick win than five that gather dust.
Early-bird and ethical discounts
Use early-bird windows to reward decisive action, not endless sales. Keep discounts rare and clearly framed (e.g., launch week or a scholarship for students/teachers). If you run a public sale, notify existing students of any upgrade path so loyalty never feels punished. Your pricing culture teaches buyers how to treat your work; aim for fair and firm, not constantly negotiable.
Common pricing mistakes and quick fixes
- Mistake: Pricing low because you’re new.
Fix: Tighten the promise and include structured support; raise price to match delivery. - Mistake: Hiding price behind a call.
Fix: List price and payment options publicly; let calls focus on fit, not sticker shock. - Mistake: Charging high but offering no proof.
Fix: Add visible outcomes, mini case studies, and a clear guarantee. - Mistake: Only one tier.
Fix: Add Plus/Pro to let buyers self-select support level.
With confident, ethical pricing in place, the final piece is trust—how you demonstrate credibility before a learner ever presses “buy.”
👤 Build Trust: Brand, Proof & Positioning
Position with a simple, specific promise
Branding isn’t just colors and fonts—it’s the promise people remember. State who you serve, what outcome you guide them to, and the constraint that makes your method believable. For example: “I help first-time course creators ship a minimum viable course in 30 days with short daily sprints.” Specificity signals expertise. It also narrows your content so you can become “the obvious choice” faster.
Add a personal why-story in 4–6 sentences: the problem you faced, the moment it clicked, and how your approach is different now. Keep it human and short. People buy from people, not faceless brands.
Build a “proof bank” you can reuse everywhere
Collect micro-proof early and often: screenshots of student progress, short quotes, before/after images, tiny wins from your free workshop. Create a “proof bank” folder to store:
- Outcome snapshots: dashboards, published pages, first sales notifications.
- Quotes: one-sentence wins pulled from emails or community posts.
- Mini case studies: 150–250 words covering context → action → result.
Rotate proof across your sales page, emails, and social posts. On the sales page, place a compelling example above the fold and sprinkle 2–3 more near your pricing table and FAQs. Authentic proof is the best ad you’ll never pay for.
Show your method, not just your credentials
Credentials can help, but clarity wins. Share a visual of your framework (even a simple 3-step sketch made in Canva). Offer a free resource that demonstrates your approach—like a checklist or a 10-minute teardown. Teaching in public—via YouTube tutorials, Twitter/X threads, or LinkedIn posts—builds credibility faster than bios alone. Link these consistently from your site, and keep your handles the same where possible for easy discovery.
If you’ve been featured or interviewed, add a compact “As seen in” row. If not, borrow authority from student outcomes and transparent process: show your curriculum outline, onboarding email sequence structure, or a behind-the-scenes of how you review student work. Transparency is trust.
Keep every touchpoint consistent
Trust fractures when tone or visuals change wildly between channels. Choose one voice (friendly, plain-spoken, no jargon) and one visual style (clean, high-contrast, readable on mobile). Use the same headshot, color accents, and CTA phrasing across your WordPress site, email footer, and course platform. In your emails (via ConvertKit or Mailchimp), keep sender name and subject style consistent so learners recognize you instantly.
Create a 1-page Brand Ops Sheet for yourself: promise, audience, top three proof points, CTA, tone guidelines, and link list. Refer to it whenever you write or record. Consistency compounds.
Turn student progress into a content flywheel
With permission, turn wins into short posts and walkthroughs. A simple rhythm: Win → Why it worked → How to try it. Publish on your main channel, tease on others, and always point back to one clear next step (waitlist, free workshop, or course page). As your proof bank grows, selling feels less like persuasion and more like showing your track record.
You now have a learning design built for action, assets that erase friction, pricing that respects both sides, and a brand that earns trust. In the next sections, you’ll turn this foundation into a high-converting sales page and a simple promotion engine that doesn’t burn you out.
🧱 Choose Your Platform Stack (Tools That Play Nice)
Start with principles, not logos
Before choosing tools, decide what your stack must do: sell securely, deliver lessons smoothly, email reliably, and track results without a data maze. For beginners, that means simplicity over features, native integrations over fragile zaps, and clear ownership of content and payments. If a tool forces you into complex workarounds on day one, it will drain your energy later. The right stack is the one you’ll actually maintain each week.
Think in flows, not parts. A student sees your post, lands on your page, joins your email list, buys, and starts learning. Your tools should make that journey feel seamless: page → checkout → access → welcome email → lesson one. If you can sketch it on a sticky note, you can build it.
All-in-one vs. assemble-your-own
You’ve got two viable paths:
- All-in-one platforms combine pages, checkout, courses, and email in one roof. They reduce setup and integration headaches. Consider options like Kajabi, Podia, or Systeme.io.
- Modular stacks let you pick best-in-class tools: website on WordPress, checkout via Stripe or PayPal, LMS like Teachable or Thinkific, email via ConvertKit or Mailchimp.
Choose all-in-one if you want momentum with minimal tech. Choose modular if you care about fine control (SEO, design, pricing flexibility) and don’t mind light plumbing.
Three beginner-friendly stack recipes
Pick one recipe and commit for 90 days:
- The Minimalist (fastest to market)
- Landing page + checkout: Podia
- Course hosting: Podia Courses
- Email: Podia Email (or connect ConvertKit)
- Use when: you want to sell this month with the least moving parts.
- The Blog-First (SEO + content hub)
- Website: WordPress + Rank Math
- Checkout: WooCommerce or Thrivecart
- Courses: LearnDash or Teachable
- Email: ConvertKit
- Use when: you plan to publish weekly and own your SEO long-term.
- The Creator Studio (live + community)
- Landing + checkout: Kajabi
- Courses + community: Kajabi Courses + Community
- Email: Kajabi Email
- Use when: you value simplicity, bundled community, and frequent live events.
Video, files, and delivery experience
Hosting video directly on your site is risky (slow, heavy). Use your platform’s native hosting or pair with Vimeo for clean playback and privacy controls. For quick demos and feedback, record Loom-style walkthroughs with Loom and embed them. Keep file sizes small, add downloadable audio for commuters, and provide transcripts for accessibility.
Organize lessons with clear labels like “Watch (5:12),” “Do (template),” and “Check (rubric).” If your LMS supports progress tracking, switch it on; a visible progress bar nudges completion.
Payments, taxes, and receipts
At minimum, connect Stripe for cards and PayPal for wallets. Use your platform’s built-in tax settings to collect the right taxes by region where needed. Send itemized receipts automatically and include links to support and your refund policy. If you sell globally, create a short “How checkout works” note to reduce confusion and support tickets.
Integrations that matter (and ones that don’t)
Keep integrations lean. Essentials: email list capture, checkout → course access, and post-purchase tagging in your ESP. Use Zapier sparingly to avoid brittle chains; if a native integration exists, prefer it. A simple rule: integrate only what saves you weekly time—not just what looks clever.
Mobile, accessibility, and speed
Most learners will check lessons on their phone at least once. Preview your sales page and first module on mobile. Use large text, sufficient contrast, captions, and alt text for images. Run your page through a speed test (your platform, image sizes, and fonts often cause drag). Faster pages convert better and keep students engaged.
Plan your “exit” before you need it
Migrations happen. Choose tools that let you export contacts, orders, and course content. Keep a clean folder of your raw videos, templates, and lesson notes in cloud storage. That way, switching platforms is an inconvenience, not a crisis.
With a stack that plays nice, you’re ready to turn attention into action. Let’s build a sales page that answers every key question before it’s asked.
🛒 Craft a Sales Page That Converts
Nail the first screen (above the fold)
The top of your page should deliver clarity fast: who it’s for, the outcome, timeline, and how to start. Place a plain-spoken headline, a short subhead, your main CTA, and a small proof cue (e.g., a quick before/after or a single testimonial). Add supportive microcopy like “Self-paced with weekly office hours” or “Start today—no advanced tech required.”
Avoid carousels and sliders; they distract. A crisp hero block beats a fancy one every time.
Turn features into outcomes
Prospects don’t want “7 modules” or “lifetime access”—they want a result. Rewrite features into benefit-driven bullets:
- Pick a niche you can sell this month (with our 15-minute filter).
- Publish a one-page offer and start outreach in one afternoon.
- Send three emails that get real replies—not unsubscribes.
Use verbs that imply motion: pick, publish, send, book, launch. Action language makes the purchase feel like forward progress.
Present the curriculum as a journey
Show the order of decisions your course guides, not a dry syllabus. For each module, list a single goal and the deliverable:
- Module 1 — Offer Clarity: By the end, your one-sentence promise and a draft headline are done.
- Module 2 — Proof Fast: You’ll collect one visible win and a quote to use on your page.
- Module 3 — Page & Checkout: Your page is live, payment connected, and tested.
When prospects can picture themselves completing steps, hesitation fades.
Price and plan selection
Use a clean, three-tier layout: Starter, Plus (Most Popular), Pro. Anchor with Pro at the left or top so other tiers feel approachable. Under each tier, list 3–5 outcome-oriented bullets and a short “Perfect if…” line. Offer payment plans with clear totals and an action-based guarantee (“Complete Modules 1–2 and, if you aren’t seeing momentum, email us within 14 days for a refund.”).
Avoid decision fatigue: limit differences to support level and review depth, not a massive feature matrix.
Deploy proof where it matters most
Place your strongest evidence near the biggest decisions:
- Above the fold: a single, believable win.
- Near the curriculum: a quick case snippet that mirrors the module.
- Near pricing: 2–3 quotes that address risk (“I’m a total beginner,” “I was short on time,” “I hate pushy sales”).
- Near the CTA bottom: a compact montage of outcomes (screenshots, checkmarks, short quotes).
One honest, specific story can outperform ten vague accolades.
Objection-first FAQ
Make your FAQ do real work. List the five most common hesitations and answer in one short paragraph each:
- “Does this work if I’m brand-new?”
- “How much time weekly?”
- “What if the tech scares me?”
- “Can I get support if I’m stuck?”
- “What’s the refund policy?”
Keep it conversational and specific. If you can link to a 2-minute tour video, even better.
Conversion hygiene: tiny tweaks, big lifts
- Repeat the primary CTA every ~2–3 sections.
- Use sticky navigation with “Enroll” or “Join the Waitlist.”
- Compress images; lazy-load below-the-fold media.
- Remove outbound links that don’t support a decision.
- Add a final CTA with a brief recap of who it’s for and what happens next.
A simple A/B plan for beginners
Test headlines and first images first; they’re high-impact. Then test pricing presentation (e.g., monthly vs. full) and guarantee phrasing. Run each test long enough to gather meaningful traffic (e.g., two full weeks or 500+ visits) rather than switching daily. Keep notes; future you will thank you.
With a page that converts interest into enrollments, your next job is driving consistent, sustainable traffic—without chaining yourself to content 24/7.
🎥 Modern Content Marketing: Shorts, Lives & Long-Form
Understand the role of each format
- Short-form video (Reels, TikTok, Shorts): Spark discovery and show tiny wins. Think “one tip, one example, one CTA.”
- Live sessions (YouTube Live, Instagram Live, Zoom): Build trust and answer objections in real time. Great for mini workshops.
- Long-form (YouTube videos, blogs, guides): Capture search traffic and deepen expertise. Ideal for showcasing your framework.
Each format feeds the others. A short becomes the hook for a live; the live becomes a long-form replay; the long-form spawns more shorts.
A weekly cadence you can keep
Start with a 3-piece rhythm you can run for months:
- One long-form (tutorial, teardown, or case walkthrough).
- Two shorts extracted from the long-form (30–45 seconds each).
- One live Q&A or mini demo that pivots to your lead magnet or waitlist.
Write your CTA once per week and keep it consistent: “Get the Starter Kit,” “Save your seat for the free class,” or “Join the waitlist.” Consistency compounds attention.
Short-form, the simple way
Use a problem → micro lesson → call-to-action formula in <45 seconds:
- Hook (0–3s): Name the pain in their words.
- Teach (4–25s): Show a 1-step fix or a quick checklist.
- CTA (26–45s): “Grab the checklist,” “Watch the full breakdown,” or “Join the workshop.”
Record in batches. Keep a sticky list of 20 hook lines and 20 micro lessons; mix and match to produce new clips quickly.
Lives that sell by helping
Structure a 30–45 minute live like a useful guided sprint:
- Promise the outcome and set expectations.
- Demo a small step, then let viewers do it with you.
- Share a quick win from a student to build belief.
- Invite to your next step (lead magnet, waitlist, or course).
- Open Q&A and frame answers as next actions.
Announce lives 48 hours and 2 hours ahead. After the stream, trim highlights into shorts and add the replay to your resource vault.
Long-form for trust and search
Create one anchor piece weekly: a 6–12 minute YouTube tutorial or a blog post on your WordPress site optimized with Rank Math. Map it to a keyword your learner would actually type, then make the content actually useful: steps, screens, and examples. End with a recap and a single next step. Avoid fluff; your goal is bookmarks and shares.
The repurposing pyramid
- Top: Long-form (tutorial/post).
- Middle: 2–4 shorts pulled from the long-form.
- Base: Social snippets (quotes, checklists, before/after images) pointing to the long-form or your lead magnet.
Build once, distribute thrice. You don’t need new ideas daily—just new entry points to the same helpful idea.
Track signals that matter
Watch views to clicks for shorts, live attendance and watch time, and long-form retention. Most importantly, track lead captures and sales influenced by each content type. If a format doesn’t build the list or warm people meaningfully, rework the hook or the CTA before abandoning the channel.
Stay human, avoid burnout
Set a maximum content budget (e.g., 3 hours/week) and protect it. Skip trends you can’t sustain. Use Canva templates for covers, and keep your lighting and audio simple. Done weekly beats perfect sometimes.
Content earns attention, but email converts attention into action. Let’s set up an inbox ecosystem that feels like a personal coach, not a billboard.
✉️ Email That Actually Works (List-Building & Sequences)
Make a lead magnet people actually use
Your best lead magnet is a starter kit that unlocks a visible win in under 30 minutes. Think “Offer Sheet,” “Sales Page Blocks,” or “First 10 Leads” outreach scripts. Host it with your email tool (ConvertKit or Mailchimp) so opt-ins are automatic and delivery is instant. Add a two-question survey on the thank-you page to capture voice-of-customer language.
Offer the magnet in context: at the end of shorts, during lives, and on your long-form pages. The CTA should promise the outcome, not the file: “Get the 15-minute offer kit,” not “Download my PDF.”
Smart opt-in placements
Place opt-ins where momentum peaks:
- The top and bottom of your most visited posts.
- A sticky header or exit intent on your sales page (for browsers who aren’t ready).
- A CTA card in YouTube descriptions and pinned comments.
- A live chat message during webinars: “Drop your email to get today’s notes.”
Keep forms light: first name + email is enough. Every extra field reduces sign-ups.
The Welcome Sequence (5 emails that feel like a coach)
Day 0: Deliver + Quick Win — Give the resource, show how to use it in 10 minutes, and ask a 1-line reply question.
Day 2: Your Story + Framework — Share the problem you solved and a simple visual of your method.
Day 4: Proof & Mini Case — Show a before/after or a student win related to the resource.
Day 6: Common Mistake + Fix — Teach one fix they can apply today; invite to a free live session.
Day 8: Next Step — Offer your waitlist or course with a friendly “here’s who it’s for.”
Write like you talk: short sentences, skimmable formatting, single clear CTA per email.
Nurture without noise
Send one value email per week. Rotate through these themes:
- How I’d do it: a 5-step breakdown of a common task.
- Teardown: fix a reader’s page or offer (with permission).
- Behind the scenes: what changed in your process and why.
- Progress prompts: a quick checklist with a 15-minute task.
Invite replies often. Real inbox conversations are the best research and build trust faster than any automation.
Launch sequences that respect the reader
When you open sales, plan 6–9 emails across 5–7 days:
- Open: restate the outcome, share what’s new, and who it’s for.
- Tour: a short video or GIF walkthrough of the dashboard and resources.
- Proof: 2–3 believable wins tied to module outcomes.
- Objections: answer the top five hesitations with specifics.
- FAQ: logistics, time, support, refund.
- Last-chance (soft): recap benefits and bonuses.
- Last-chance (hard, optional): clear deadline with timezone.
Keep subject lines plain and helpful. Add a “fewer emails” link for readers who want only key updates; it reduces unsubscribes while keeping consent.
Onboarding and success path
After purchase, your onboarding series should get learners moving immediately:
- Instant: receipt + access + “Start Here” (video + link to Starter Kit).
- Day 1: “Finish Lesson 1 today” + a 10-minute task.
- Day 3: checkpoint prompt (“Reply with your headline”).
- Day 7: invite to office hours; spotlight a small win from a peer.
- Day 14: celebrate progress; suggest the next visible step and request a short testimonial if appropriate.
Onboarding is where your promise turns real. Keep it crisp; keep it encouraging.
Win-back and list hygiene
Every 3–4 months, run a re-engagement: three emails—“Still want tips like this?” → “Here’s a gift if you’re in” → “We’ll pause emails unless you click.” Archive or remove inactive subscribers to protect deliverability. Regularly clean bounced addresses and obvious spam traps. A smaller, engaged list beats a large, indifferent one.
Deliverability basics (the unglamorous edge)
Authenticate your domain (SPF/DKIM/DMARC) through your ESP’s setup. Avoid link-heavy, image-heavy layouts in routine emails; plain text with one button often lands better. Send consistently. Spiky, infrequent sending hurts reputation and, ultimately, revenue.
With a stack that behaves, a page that converts, content that attracts, and email that nurtures, you’re no longer guessing—you’re operating a system. In the next sections, you’ll layer on launch mechanics, engagement, and light automation to scale without burnout.
🚀 Launch Playbooks: Live, Evergreen & Hybrid
Pick the launch style that matches your season
Choose a launch model you can run consistently, not the one with the flashiest tactics. If you have time and energy for real-time coaching, a Live Launch gives you momentum and feedback fast. If your schedule is crowded, Evergreen (an on-demand workshop + automated follow-ups) protects your calendar. If you want steady sales with moments of excitement, go Hybrid: an evergreen funnel supported by a monthly live event. The best choice is the one you can repeat without burning out.
To decide quickly, answer three questions:
- How many hours can you go live this month?
- How warm is your audience (do you already get replies and DMs)?
- Do you have at least one proof story you can tell confidently today?
If your answers are “few hours, lukewarm, yes,” go Hybrid. If you have no proof yet, a scrappy Live Launch is the fastest path to getting it.
The no-drama Live Launch timeline (T-14 to T+2)
- T-14 to T-10 (Plant seeds): Announce a free “mini-win” class. Share one tip daily; invite questions you’ll answer live. Create a simple signup page via your LMS or ConvertKit.
- T-9 to T-5 (Build demand): DM warm leads with a kind, short invite. Post a 30-second teaser. Send two reminder emails: “What you’ll build” and “Toolkit you’ll get.”
- T-4 to T-1 (Set the room): Finalize slides; prep a 3-sentence story for each objection. Test checkout with Stripe or PayPal.
- T-0 (Deliver): Teach the mini-win live on Zoom or YouTube Live. Make the result visible (a published page, a draft email, a checklist completed).
- T+1 to T+2 (Follow-through): Send the replay, a short action checklist, and open cart for 5–7 days. Host a Q&A stream. Close with a clear deadline.
Keep the agenda tight: promise, quick proof, three small loops of “demo → do,” invite, Q&A. Selling happens through helping; your content should stand on its own.
The free workshop that actually converts
Treat your workshop like a guided sprint, not a lecture. Frame one outcome (“Publish your one-page offer”). Share a tiny success example that mirrors the audience. Run a three-step activity with timers; show your screen, then let learners do it with you. Announce your course as the continuation of this sprint. Offer a practical bonus for early buyers—like a personal review or a starter template pack—rather than a discount.
Have a simple closing script:
- Who this is for and the result they can expect.
- What’s inside (outcomes, not modules).
- How support works (office hours, reviews, community).
- What to do next (link + deadline).
Stay calm and conversational; pressure kills trust.
Evergreen engine: on-demand without the sleight of hand
Record a clean version of your workshop and host it as an on-demand training. Pair it with an email sequence that delivers a reminder, a “notes PDF,” and a short Q&A compilation. Use ethical urgency: time-bound bonuses (e.g., a free page review if you enroll within 72 hours) or a rotating office hour that’s legitimately capacity-limited. Tools like Kajabi or Podia make this flow simple; if you’re modular, connect your webinar host to your ESP with Zapier.
Keep the watch page focused: the video, the notes button, and one clear enroll CTA. Remove sidebars and social distractions. Offer a 15-minute “Ask Me Anything” slot via Calendly for buyers who need reassurance; cap slots to protect your time.
Hybrid cadence: steady sales plus live trust
Run your evergreen funnel all month, then pulse with a live session near month-end. During that week, refresh proof posts, share new wins, and answer fresh objections. This rhythm gives newcomers a reason to act now while you avoid the feast-or-famine roller coaster. Keep assets reusable: the same slides, same outline, new examples.
Launch-week traffic checklist
- Daily short video: one hook, one tip, one CTA to your free training.
- Two emails: “Behind the scenes” and “Common mistakes to avoid.”
- One live or audio room: 20-minute demo + Q&A.
- Three proof posts: screenshot, quote, or quick case.
- Individual invitations: 10–20 DMs to warm contacts (never pushy; ask permission to share details).
Handling objections and DMs at scale
Pre-write friendly, human replies for the top five hesitations: time, tech, beginner fear, price, and support. Save them as snippets in your email tool or community. During launch, host a short daily “office hour” for questions; pin the recap. When the same question repeats, make a 2-minute Loom and reuse it.
Once buyers join, the real work begins—helping them finish. Engagement isn’t a nice-to-have; it’s your reputation engine.
🤝 Keep Students Engaged: Completion, Community & Momentum
Design the first 48 hours like a theme park entrance
Students decide whether they’ll finish in the first two days. Send a welcome email with three links only: “Start Here” video, Starter Kit, and the first 10-minute task. In your LMS, make Lesson 1 a visible win (publish a draft page, write a headline, or send the first outreach). Add a confetti moment—a checklist tick or badge—when they complete it. Momentum beats motivation.
Make success feel inevitable: “Most students finish Lesson 1 in 12 minutes. You’ve got this.” Set expectations that questions are welcome and feedback is fast.
A weekly rhythm that quietly compels action
Hold one office hour each week at a predictable time (record it). Start with two examples of student progress, then take questions in order. Keep answers actionable: what to do in the next 48 hours. Share a time-stamped replay and link it from your course dashboard. This habit alone boosts completion.
Create peer pods of 3–5 students. Give them a five-message playbook:
- Goal for the week,
- Work block,
- Proof screenshot,
- Quick feedback request,
- Next step commitment.
Pods create lightweight accountability without heavy moderation.
Community prompts that don’t need babysitting
Choose one home—your platform’s built-in community, Discord, or a dedicated tool like Circle (circle.so). Pin three threads: Win Wednesday, Feedback Friday, and Office-Hour Announcements. Draft seed posts for Week 1–4 so you’re never blank. Encourage specificity: ask for a screenshot, a link, or the exact line they want help with.
Keep moderation simple: be kind, be specific, no spam. You don’t need dozens of channels; two or three is enough for clarity.
Feedback loops that upgrade the course in public
Add checkpoints at the end of each module: a short form with “What worked?”, “What felt fuzzy?”, “What would have helped you move faster?”. Record quick 2-minute Loom replies with your answer or a pointer to a resource. Every few weeks, publish a changelog: “We added a pricing checklist and updated Module 2 examples.” Students love seeing the course improve because of them.
Document recurring friction. If three students stumble on the same step, there’s a fix waiting: a shorter video, a template, or a clearer rubric. Improve the path, not just the lecture.
Rescue plan for stalled students
When someone is quiet for 7–10 days, trigger a nudge: a gentle email that gives them one tiny next step and a link to office hours. If they still don’t move, offer a 10-minute “unblock call” limited to a handful of slots per week. Set a rule: no shame, just clarity. The goal is to restart motion with the smallest possible action.
Create a “Back on Track” bundle: a 15-minute recap video, a checklist, and three done-for-you lines they can copy. Friction melts when the next step is unmistakable.
Graduation, next steps, and referrals
Celebrate completion with a simple badge, a shoutout, and a private note. Invite grads to share a short “before → after” story you can add to your proof bank. Offer a referral bonus that helps both sides (a free page review for the referrer; a Starter Kit upgrade for the new student). Keep alumni engaged with quarterly live sessions focused on what’s new and what’s working now.
Engagement produces results and proof. To steer your ship, measure a few key numbers—then act on them every week.
📈 Measure What Matters (Metrics, Benchmarks & Dashboards)
A minimal metric set you’ll actually use
You don’t need a wall of graphs; you need four numbers and one question: “What’s the smallest change that improves the next bottleneck?” Track weekly:
- Leads added (new subscribers),
- Sales (orders),
- Completion rate (Module 1 and overall),
- Refunds (count and reasons).
These four tell you if attention is growing, offers resonate, lessons are finishing, and trust is intact.
Then pick one focus metric each week (e.g., waitlist → show-up rate for your live class) and run a small test. Successful operators improve one link at a time.
Funnel clarity: from attention to enrollment
Set up a simple funnel view: Traffic → Leads → Checkout → Enroll. For beginners, rough sanity ranges look like this (your mileage will vary):
- Visitor → Lead: 1–5% on content pages; 15–40% on opt-in landing pages.
- Lead → Workshop show-up: 25–45% live, 40–70% for replays.
- Workshop attendee → Sale: 3–10% for new creators; 10–20% as proof grows.
- Lead → Sale (overall within 30 days): 1–5% is a healthy starting range.
If your opt-in is low, sharpen the outcome you promise. If show-up lags, send better reminders (calendar invites and SMS where appropriate). If sales are soft, increase proof and clarify support.
Learning health: find the drop-off and fix it
Track where learners stall: start rate, first 48 hours activity, Module 1 and Module 2 completion, and time to first public win. If many never start, your onboarding misses the mark—simplify Lesson 1 and remind them where to click. If they start but don’t continue, shorten videos, add a Quickstart path, and host a structured office hour.
Create a tiny survey inside your LMS after Module 1: “How confident do you feel, 1–5?” Low scores flag a messaging mismatch or a tool hurdle you can fix with a template.
Revenue signals that keep the lights on
Watch Average Order Value (AOV), payment plan health (failed payments caught within 7 days), and refund rate. If refunds cluster around the same promise, tighten your copy and consider an action-based guarantee. If payment failures are common, enable automatic retries in Stripe and send a friendly reminder with a self-serve update link. Aim for a refund rate that reflects honest marketing and solid delivery—low single digits is a good sign for beginners.
Build a one-screen dashboard
Use a simple Google Sheets or Notion board: one tab for funnel numbers, one for learning health, one for revenue. Color-code cells by status (red/amber/green). Add a notes column to record what you changed this week. Over time, this becomes your playbook: which hooks worked, which pages converted, which assets saved support time.
Run a weekly review ritual
Set a recurring 45-minute block:
- 10 min: scan the dashboard and highlight one bottleneck.
- 25 min: choose one test (headline A/B, proof placement, shorter Lesson 1) using a lightweight scoring model like ICE (Impact, Confidence, Ease).
- 10 min: publish the change and schedule a reminder to check it next week.
The ritual matters more than any specific tool. Improvement is a habit, not a sprint.
Once you know what to fix, systems can handle the repetitive parts. Automate first, then bring in human help where it multiplies your time.
🤖 Automate & Outsource Smartly
Automate first, outsource second
Automation handles recurring, rules-based tasks; people handle nuance and quality. Start by writing the manual steps once, then ask: “Can a tool do this reliably?” If yes, automate. If not, write a short SOP with screenshots so a helper can replicate it.
Keep automations short and sturdy. Chains of 8 steps break during launches. Prefer native integrations inside your LMS and ESP; use Zapier or Make for the gaps only.
Five beginner automations that pay for themselves
- Lead magnet delivery + tag: When someone opts in, send the resource immediately, apply a tag, and start the welcome sequence. Tools: your ESP (ConvertKit or Mailchimp).
- Event reminders: For live workshops, trigger reminders at 24 hours, 2 hours, and 10 minutes; include a calendar link. Tools: ESP + Google Calendar invite.
- Post-purchase onboarding: On successful payment in Stripe or your platform, enroll the student, send access, and kick off a 14-day “success path” email sequence.
- Failed payment dunning: If a payment fails, retry automatically, then email a friendly link to update details. Keep tone helpful, not scary.
- NPS and proof collection: After Module 2 and at graduation, send a one-question satisfaction check and a permission request to share wins. Save responses to a “proof bank” in Airtable or Google Sheets.
Each automation should have an owner, even if that owner is you. Review monthly to fix stale links and outdated wording.
SOPs and templates: your compounding assets
For every repeatable task, create a 1-page Standard Operating Procedure: purpose, trigger, tools, steps (bulleted), screenshots, and the “done” definition. Store SOPs in Notion and link the exact forms or pages they reference. Templates turn helpers into force multipliers: canned replies, DM scripts, page blocks, email skeletons. The more you pre-decide, the faster everything moves.
Hiring your first helper without headaches
Start with a flexible VA (virtual assistant) for 5–10 hours/week. Trial them on concrete tasks: formatting lesson pages, clipping Q&A highlights, scheduling reminder posts, or cleaning email tags. Give one task at a time with a clear SOP and a definition of success. Ask for a short Loom of how they completed it—that’s your quality check and a training asset.
As needs grow, consider specialists: a video editor for batch cuts, a design helper for Canva assets, or a community moderator for 1–2 hours/day. Keep roles narrow and outcomes measurable.
Toolchain for light ops
- Scheduling & calls: Calendly
- Forms & surveys: Tally or Typeform
- Databases & proof bank: Airtable or Google Sheets
- Team chat: Slack or Discord
- File delivery & video: Vimeo and Loom
Pick one option in each category and stick with it for a quarter.
Guardrails: privacy, consent, and backups
Respect subscriber consent: use double opt-in when possible and an obvious unsubscribe link. Store only what you need, and keep student data in one secure, access-controlled place. Back up raw course files in cloud storage (organized by module), export your email list monthly, and maintain a “break glass” document with logins and critical steps if a tool goes down.
When to automate more, when to hire
Automate when a task:
- Happens 3+ times/week,
- Follows a clear rule,
- Doesn’t need judgment or creativity.
Hire when a task:
- Requires tone, taste, or nuanced decisions,
- Touches your brand voice or student coaching,
- Happens in unpredictable bursts.
Your goal isn’t a machine that replaces you; it’s a system that amplifies you.
With a repeatable launch cycle, engaged students, clear metrics, and a light ops layer, you’re operating like a seasoned creator—just with fewer headaches. In the next part, we’ll tie it all together into a simple 30-day plan and highlight the common pitfalls to dodge as you scale.
⚖️ Legal & Ethical Foundations (Make Good Promises)
Keep promises realistic and verifiable
Your reputation rests on the promises you make—and keep. Frame outcomes as observable steps rather than life-changing miracles. Instead of “Make $10k in a week,” say “Publish your offer and book your first discovery calls using three email prompts.” Use proof you can show—screenshots, short quotes, and before/after examples—while clarifying that results vary with effort and context. If you ever spotlight a standout result, add a plain-English note: what the learner did, how long they worked, and what pre-existing advantages helped.
Be specific about the timeline and what “done” means inside your course. If the win you promise normally takes 30–45 days, don’t say seven. When outcomes are realistic, refunds drop and referrals rise.
Be transparent about pricing, guarantees, and policies
List your prices where buyers can see them—no surprise paywalls. If you offer payment plans, show the total cost alongside the monthly number and explain how access works. Offer a fair refund that balances buyer safety and your time, such as an action-based guarantee: “Complete Modules 1–2 and the worksheets within 14 days. If you’re not gaining momentum, reply to this email for a refund.” Keep your refund window and steps on the checkout page and in your confirmation email.
If you sell live elements with limited spots (reviews, 1:1 calls), say how many are available and how you allocate them. Clarity prevents support headaches later.
Respect consent and privacy from the start
Collect emails with explicit permission. Use double opt-in if you can, add a visible unsubscribe link to every message, and store only what you need. Keep a short Privacy Notice on your site describing what you collect (e.g., email, payment info processed by your provider), why you collect it (course access, updates), and how people can request deletion. If you use tracking pixels or analytics, tell readers in simple terms and provide a way to opt out.
When you run a community, publish a brief Community Code: be kind, no spam, protect personal data, no medical/financial/legal advice. Pin it where everyone can find it.
Make your course accessible and inclusive
Accessibility isn’t just ethical; it grows your audience. Provide captions for videos, transcripts for lessons, and alt text for images. Use high-contrast colors and legible font sizes. Avoid flashing effects and cluttered layouts. In your welcome email, invite learners to request reasonable accommodations (longer deadlines, alternative formats). You’ll gain grateful students and stronger word of mouth.
Use assets you’re actually allowed to use
Assume nothing is “free to grab.” Use images, icons, music, fonts, and templates that you own or license. Tools like Canva include built-in libraries; stock marketplaces provide licenses—save them. If you display students’ work, ask permission first and clarify how you’ll use it (sales page, newsletter, social). When you mention tools or brands, link to their official sites—e.g., WordPress, Teachable, Stripe—and keep your opinions fair and factual.
Taxes and receipts without the panic
If your platform collects the applicable taxes for you, enable it. If not, consult a local professional about sales tax/VAT for digital products in the places you sell. Either way, send itemized receipts automatically with your business details, product name, and support email. Store transaction records securely. You don’t need to be a tax expert—you do need a tidy paper trail.
Package your legal basics
Create a simple Legal Pack on your site:
- Terms of Use: who the course is for, what’s included, fair use of your materials.
- Refund Policy: eligibility, time window, how to request.
- Privacy Notice: what you collect, why, how to opt out or delete data.
- Community Guidelines: expected behavior, consequences, reporting.
Write in plain language. Legalese doesn’t make you safer; clarity does.
With ethical promises and clear policies, you’re set up to sell responsibly. Next, let’s disarm the most common mistakes before they slow you down.
🧯 Common Pitfalls & How to Fix Them
Pitfall 1: Building too much before you have proof
Symptom: Dozens of recorded lessons, no buyers.
Fix: Ship a mini workshop first. If 30–100 people register and 5–10 buy a beta, proceed. If not, sharpen your outcome and try again. Build with evidence, not hope.
Pitfall 2: A promise that’s too vague
Symptom: “Learn marketing” or “Grow your brand.”
Fix: Use the transformation sentence: “In X weeks, [who] will [specific result] without [dreaded pain].” Put it at the top of your sales page and workshop invite.
Pitfall 3: Long videos, low completion
Symptom: Students stall at Module 1.
Fix: Cut lessons to 5–8 minutes with one job each. Add a Quickstart that delivers a visible win in hour one and a checkpoint at the end of each module.
Pitfall 4: Tech spaghetti
Symptom: Six tools stitched by brittle automations.
Fix: Choose one all-in-one (e.g., Kajabi, Podia) or a simple modular stack you understand (e.g., WordPress + Teachable + ConvertKit + Stripe). Prefer native integrations.
Pitfall 5: Thin proof
Symptom: Great copy, no outcomes on display.
Fix: Build a proof bank routine: capture one screenshot, one quote, and one short case each week. Place a top example above the fold and two more near pricing.
Pitfall 6: Pricing fear
Symptom: Underpricing to feel “safe.”
Fix: Offer Starter / Plus / Pro tiers. Anchor with Pro, highlight Plus as “Most Popular,” and add a fair guarantee. Price to match the time saved or result unlocked.
Pitfall 7: Launch burnout
Symptom: Big pushes followed by long silences.
Fix: Go Hybrid: evergreen workshop running quietly + one live event per month. Repurpose the same assets with fresh examples.
Pitfall 8: Overwhelmed support
Symptom: Inbox floods, no time to create.
Fix: Publish FAQs, set office hours, and install SOPs with canned replies. Offer limited “unblock” calls each week to help the truly stuck.
Pitfall 9: No time to improve
Symptom: Busy but stuck at the same conversion rates.
Fix: Run a weekly 45-minute review: check four numbers (leads, sales, completion, refunds), pick one bottleneck, and ship one improvement.
Now that the potholes are marked, let’s translate everything into a clear 30-day plan you can start today.
🗓️ Your 30-Day Beginner Action Plan
Week 1 — Clarity, footprint, and the first assets
- Day 1: Write your transformation sentence and learner portrait.
- Day 2: Draft a one-page outline: Quickstart + 3–5 modules with one outcome each.
- Day 3: Create a Starter Kit (offer sheet, headline swipes, email trio). Host files in Google Drive or Notion.
- Day 4: Set up your landing page (WordPress + Rank Math or platform builder). Include promise, bullets, and opt-in.
- Day 5: Connect email (ConvertKit or Mailchimp), deliver the Starter Kit automatically, add a two-question survey.
- Day 6: Outline a mini workshop (45–60 minutes): promise, three micro loops, invite.
- Day 7: Announce the workshop across your channels with a short video and a simple graphic from Canva.
Goal: 50+ waitlist signups or 30+ workshop registrations.
Week 2 — Teach, listen, and sell the first seats
- Day 8: Send a reminder email and DM warm contacts with a friendly invite.
- Day 9: Finalize slides and test checkout (Stripe/PayPal).
- Day 10: Run the mini workshop. Deliver the visible win live.
- Day 11: Send the replay + checklist; open beta enrollment (limit seats).
- Day 12: Host a 20-minute Q&A live addressing top objections.
- Day 13: Share 2–3 proof posts (screenshots, quick quotes).
- Day 14: Close beta enrollment with a clear deadline and outline onboarding.
Goal: 5–10 beta buyers at a fair starter price.
Week 3 — Page, emails, and delivery prep
- Day 15: Build your sales page: above the fold clarity, journey-based curriculum, pricing table, and objection-first FAQ.
- Day 16: Write the Welcome (5 emails) and Onboarding sequences.
- Day 17: Record Lesson 1 (5–8 minutes) + Quickstart worksheet; add captions and transcripts.
- Day 18: Assemble the Resource Vault and a simple searchable index.
- Day 19: Set up community threads: Win Wednesday, Feedback Friday, Office Hours.
- Day 20: Run a tech rehearsal: test access, purchase, and first email.
- Day 21: Publish a behind-the-scenes long-form post or video that links to the sales page.
Goal: Sales page live, onboarding ready, Lesson 1 published.
Week 4 — Launch cleanly, onboard warmly, learn quickly
- Day 22: Open cart for 5–7 days with a calm, helpful tone.
- Day 23: Send the tour email (short dashboard walkthrough).
- Day 24: Post a mini case and host a micro-Q&A.
- Day 25: Share a mistake + fix email; nudge fence-sitters gently.
- Day 26: Add two short FAQ videos where confusion persists.
- Day 27: Last-chance email (soft), focusing on the next 14 days’ support.
- Day 28: Close cart and start onboarding: “Finish Lesson 1 today.”
- Day 29: Run your first office hour; spotlight two quick wins.
- Day 30: Review your dashboard: leads, sales, completion start rate, refund requests. Choose one improvement to ship next week.
Goal: Warm onboarding, early wins, and at least one tangible lesson learned to implement in the next cycle.
You now have a timeline you can reuse every month or quarter. As questions arise, keep the answers simple and human.
🙋 FAQs: Beginner Questions About Sell Online Courses Answered
Do I need a big audience to start?
No. You need a clear promise and a way to reach a small group consistently. A 50–200 person waitlist can validate your idea. Focus on proof over popularity.
What gear do I need for video?
Start with what you have: a phone, natural light, and a quiet room. Keep shots tight, lessons short, and audio close to your mouth. Upgrade later if recording becomes your bottleneck.
Should I build a cohort or a self-paced course?
If you crave live energy and fast feedback, try a beta cohort. If your schedule is tight, start self-paced with weekly office hours. Many creators go hybrid: self-paced content + live Q&A.
How long should my course be?
Long enough to deliver the promised win, no longer. Most beginner wins fit into 3–5 core modules plus a Quickstart. If you can’t outline a 60-minute win, the topic may be too broad.
What if someone else already sells my topic?
That’s good—it signals demand. Differentiate with who you serve, your constraints (time, tools), and your method. You don’t need to be the only teacher; you need to be the clearest for your person.
How do I pick a price as a beginner?
Offer Starter / Plus / Pro. Price Starter to match the time saved or first outcome; add support in Plus; keep Pro for deeper feedback. Pair with a fair guarantee so buyers feel safe.
Do I need a fancy website?
No. A one-page site with your promise, bullets, proof, and a checkout is enough. If you want long-term SEO, go WordPress + Rank Math. Otherwise, an all-in-one is perfectly fine.
How many emails should I send during a launch?
Plan 6–9 emails across 5–7 days: open, tour, proof, objections, FAQ, and last-chance notes. Keep tone friendly and helpful; offer a “fewer emails” link if possible.
What about refunds and chargebacks?
Publish a plain-language policy with an action-based guarantee and a simple request process. Treat people fairly and document steps. Clear onboarding and realistic promises reduce issues.
Can I run paid ads right away?
Not recommended. Get your offer converting with organic first. Once your sales page and emails work, consider ads to scale what’s already proven.
How do I stay motivated?
Work from a tiny weekly ritual: a dashboard check, one improvement, and one proof capture. Celebrate small wins. Momentum beats motivation.
With principles, plans, and answers at your side, you’re set to move from idea to income with integrity.
✅ Key Lessons & Takeaways
Put learners first, always
Design for observable wins and low cognitive load. Short videos, single-action tasks, and quick checkpoints beat long lectures every time.
Promise what you can prove
Lead with a clear outcome and back it with visible proof. Keep policies simple, prices transparent, and guarantees fair.
Build once, reuse often
Repurpose a single workshop into an evergreen asset, a sales page tour, several shorts, and a lead magnet. Systems outwork sprints.
Measure lightly, improve weekly
Track leads, sales, completion, refunds. Choose one bottleneck per week and ship a fix. Progress compounds.
Automate the boring, humanize the rest
Automate delivery, reminders, receipts, and feedback prompts. Stay human in coaching, community, and your inbox.
Grow with integrity
Respect consent, protect data, credit others’ work, and keep accessibility in mind. Doing the right thing is also the smart thing for long-term growth.
Disclaimer
This article is for educational purposes only. It does not constitute legal, tax, accounting, financial, or professional advice. You should consult qualified professionals regarding your specific situation, including—but not limited to—business formation, contracts, consumer protection, privacy (e.g., email and data regulations), advertising disclosures, and taxes.
We do not guarantee results or earnings. Any examples, case studies, or figures are illustrative and reflect individual circumstances that may not be typical. Your outcomes will depend on many factors, including skill, effort, market conditions, audience fit, and timing.
References to third-party tools, platforms, and trademarks (e.g., course hosts, payment processors, email service providers) are provided for convenience only and do not imply endorsement or affiliation. All trademarks are the property of their respective owners. Features, pricing, and policies for these tools change frequently—verify details directly with the provider before making decisions.
Where this article links to external resources, we are not responsible for the content, accuracy, or availability of those sites. If we recommend products or services, assume we may receive a commission at no additional cost to you (this supports our work). Always perform your own due diligence.
Information was prepared with care and is believed to be accurate as of October 31, 2025, but may become outdated or superseded. By using any ideas or resources from this article, you agree that you do so at your own risk and that we are not liable for any losses, damages, or issues arising from your actions.


)